Welcome to your go-to guide on how to lay paving stones in NZ. Whether you’re planning a new garden path, driveway, or patio, this step-by-step walkthrough is designed to help you get the job done right, even if you’ve never laid a paver before. We’ll break down the tools you need, common mistakes to avoid, and the exact process used by professionals across New Zealand. With clear instructions and practical tips, you’ll be able to create a durable, level, and great-looking paved surface that holds up in all weather.
To lay paving stones in NZ, start by planning and marking the area, then dig out the soil to the correct depth. Add a compacted base layer of gravel, followed by a smooth layer of bedding sand. Place each paving stone carefully, maintaining even spacing and level. Fill gaps with joint sand and compact the entire surface. Finish by sweeping the area clean. This method ensures a stable, long-lasting paved surface suitable for NZ’s weather.
Table of Contents
Why Paving Stones Are A Great Choice In NZ
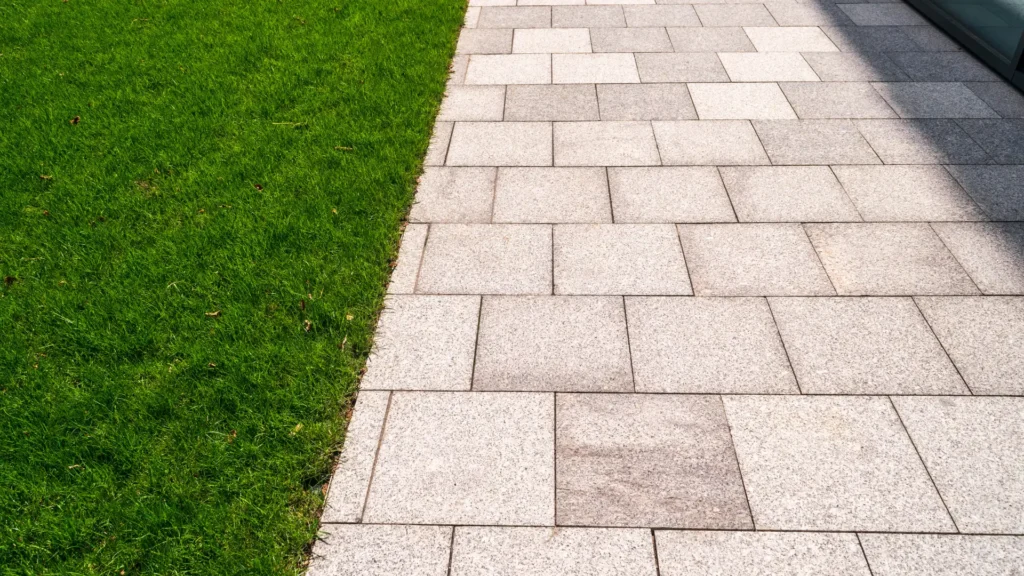
Paving stones have become a popular option for New Zealand homeowners, and for good reason. They offer a smart, practical solution for driveways, patios, garden paths, and outdoor living areas. If you’re planning a landscaping project, here’s why paving stones are worth considering.
Durable For NZ’s Changing Weather
New Zealand’s climate varies significantly from region to region. From heavy rainfall in the West Coast to strong UV exposure in the North Island, outdoor materials need to stand up to the elements. Paving stones are built to handle these changes. They resist cracking under temperature fluctuations and remain stable even with seasonal ground movement. Unlike poured concrete, individual pavers can shift slightly without causing major surface damage. If one stone does break, you can replace it without tearing up the entire area.
Cost-Effective And Low-Maintenance
Compared to other outdoor surfacing options like poured concrete or decking, paving stones offer better long-term value. While the upfront cost may be slightly higher than gravel or mulch, they last longer and require less upkeep. You won’t need to repaint, reseal, or sand them regularly. Occasional sweeping and the occasional top-up of joint sand is usually enough to keep them looking clean and neat. Plus, repairs are easy. Instead of patching a large slab, you can simply lift and replace the affected stone.
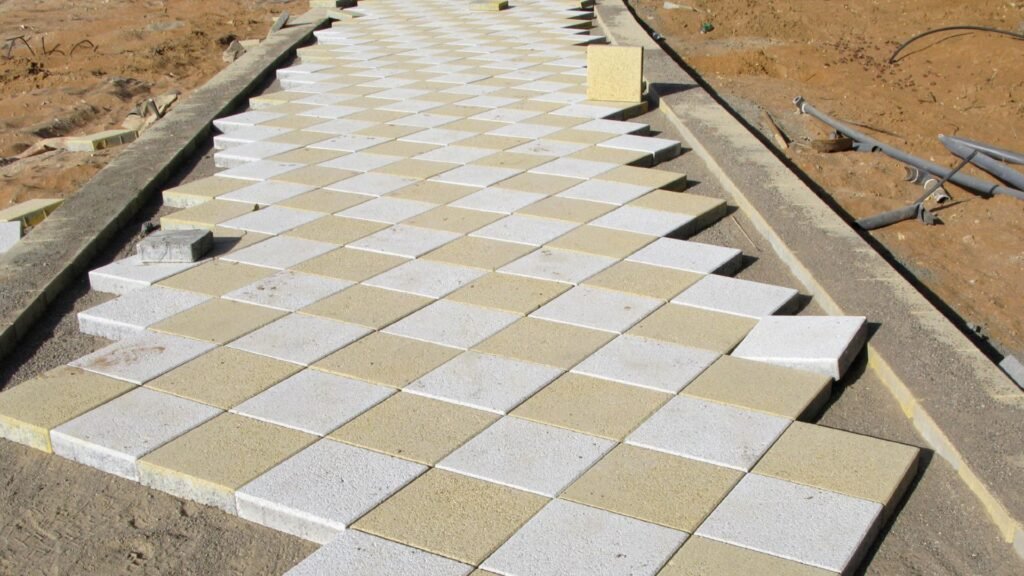
Wide Range Of Styles And Finishes
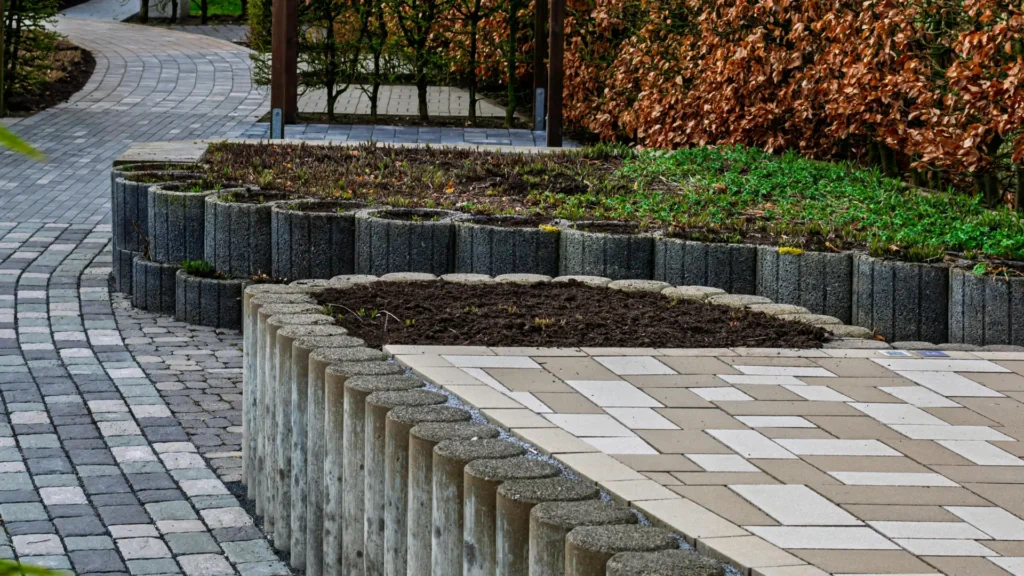
Paving stones give you full control over the design of your outdoor space. Whether you want a sleek, modern look or a rustic finish, there’s a style to match your taste. You can choose from natural stone, concrete, brick, or clay pavers, each available in a range of textures, colors, and patterns. Mix and match different shapes or create borders to frame your space. This flexibility makes it easy to design a layout that complements your home and garden.
Locally Available Materials
Many paving products used in NZ are sourced or manufactured locally. That means you can support New Zealand suppliers while also reducing shipping costs and environmental impact. Choosing local materials also ensures that the product is suited to the conditions here. Whether you’re buying from Bunnings, Mitre 10, or a local landscape supplier, you’ll have access to quality stones that meet NZ standards. And because they’re readily available, you can easily get more if your design changes or if you need to make repairs later.
Paving stones offer a durable, low-maintenance, and highly customizable option for outdoor spaces in New Zealand. Their ability to handle the country’s unique climate conditions, along with the variety of choices and local availability, makes them a smart investment for any homeowner.

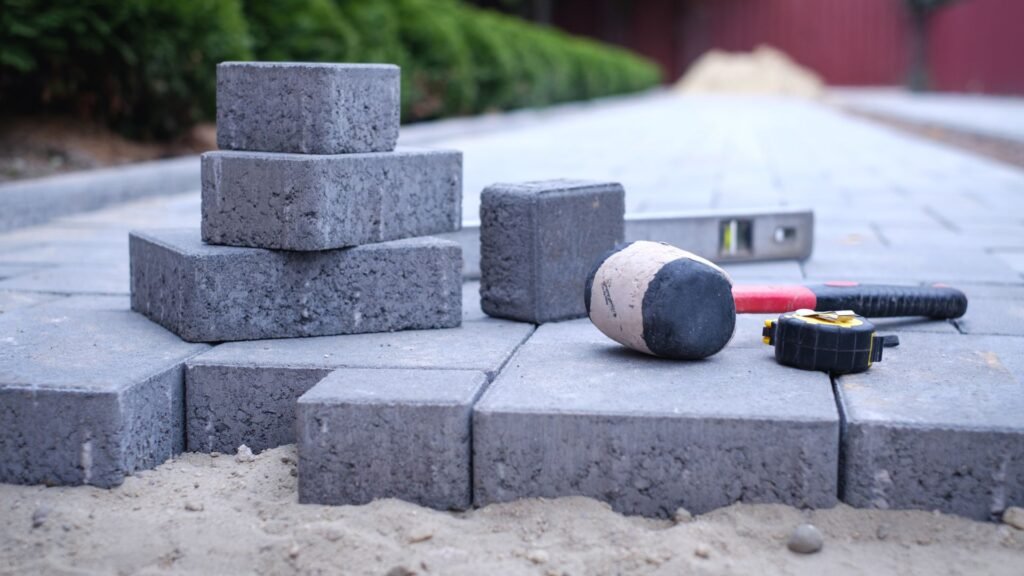
Tools And Materials You’ll Need
Before you start laying paving stones, it’s important to gather the right tools and materials. Having everything on hand saves time, prevents mistakes, and ensures a smoother DIY experience. Whether you’re building a garden path or a small patio, these essentials will help you get the job done properly.
Here’s a complete checklist of what you’ll need:
- Paving Stones
Choose stones that match your design and intended use. Thicker pavers work well for driveways, while lighter ones suit garden paths or patios. Look for locally sourced options that can withstand New Zealand’s climate. - Tape Measure
Accuracy matters. Use a reliable tape measure to mark out your area and measure distances between stones. This helps keep the layout symmetrical and ensures a clean finish. - String And Stakes
These help define the edges of your paving area. Stretch string between stakes to create straight lines and right angles. This keeps everything aligned during installation. - Shovel Or Spade
You’ll need a sturdy shovel for digging out the base area. A square-mouthed spade works best for leveling and clearing soil. Make sure the blade is sharp for easier digging. - Spirit Level
This tool is key to a level surface. Use it to check both the base and the top of your pavers. Even slight slopes or uneven areas can cause water pooling or wobbly stones. - Compactor
A plate compactor (also known as a vibrating compactor) is essential for creating a solid foundation. It compresses the base material and sand, reducing the risk of sinking or shifting. - Screed Board
This flat board helps you level the sand layer before placing the pavers. You can use a timber plank or buy a purpose-built screed tool. Slide it across the guides to get an even surface. - Sand And Gravel
You’ll need two layers of material beneath your paving stones. Use compacted gravel (base course) for drainage and stability. Add a 2–4cm layer of coarse sand on top as a bedding layer. Avoid fine beach sand, which won’t support the pavers properly. - Quick Tip: Where To Buy Or Rent Tools In NZ
You can find most of these tools at local hardware stores like Mitre 10, Bunnings, or PlaceMakers. If you don’t want to buy a compactor or screed board, consider renting from hire shops like Hirepool or Kennards Hire. They offer short-term rentals at reasonable prices, ideal for one-time DIY projects.
Having these tools ready before you begin helps ensure a more efficient, professional-looking result. It also makes the process less frustrating, especially if it’s your first time laying paving stones.
Step 1: Planning Your Area
Before you start laying paving stones, careful planning is essential. This first step ensures your project runs smoothly and meets New Zealand standards. Skipping this stage often leads to uneven surfaces, water pooling, or even legal issues. Here’s how to plan your paving area properly.
- Measure The Space
Start by measuring the exact area you want to pave. Use a tape measure to get the length and width in metres. Write these down and calculate the square metres. This helps you estimate how many paving stones and materials you’ll need. Always add an extra 5–10% for cutting, breakage, or design adjustments. - Mark Out Your Area With String
Once you’ve measured, use stakes and string to outline the area. This gives you a visual guide of your space and helps keep your lines straight during installation. A clear outline also helps with excavation, so you only dig where needed. - Consider Drainage And Slope
One of the most overlooked steps in DIY paving is planning for drainage. If water can’t drain properly, it will pool and damage the paving over time. Make sure your area has a slight slope, about 1–2 cm per metre, leading away from buildings or structures. This ensures rainwater flows in the right direction and reduces long-term issues. - Get Council Approval If Needed
Some paving projects in New Zealand require council approval, especially if they affect public pathways, stormwater systems, or large outdoor structures. For residential properties, basic garden paths and patios typically don’t need consent. But if you’re unsure, it’s smart to contact your local council. Each region has its own regulations, so always check first to avoid future problems..
Planning your area isn’t just about measurements. It’s about preparing for a smooth, legal, and long-lasting paving job that fits your property and local rules. Taking 30 minutes to plan properly can save hours of fixing later.
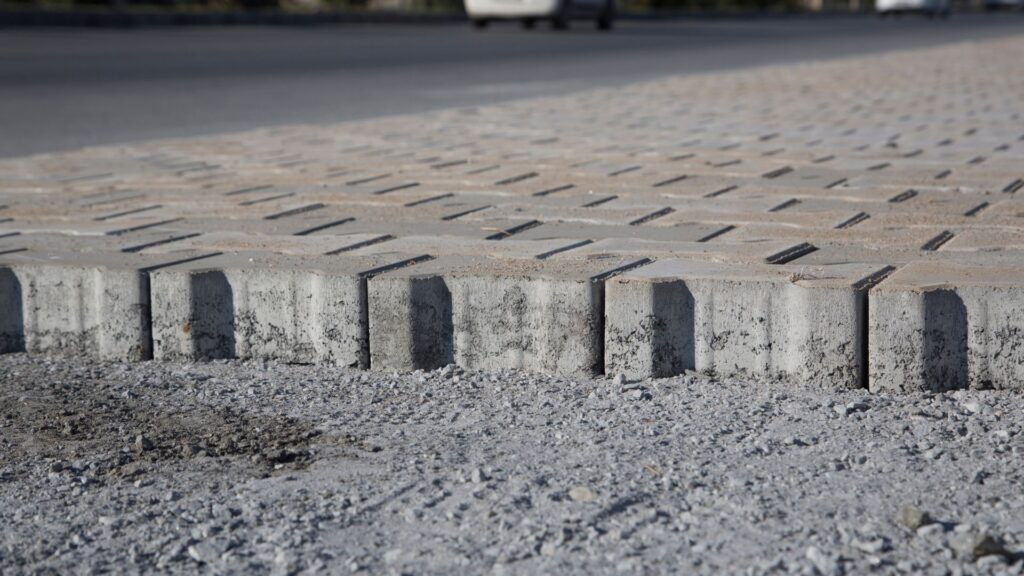
Step 2: Preparing The Base
Preparing a solid base is one of the most important steps when laying paving stones. If you skip this step or do it poorly, your paving stones may sink, shift, or crack over time, especially with New Zealand’s wet climate and frequent ground movement. A well-prepared base gives your pavers strength, stability, and longevity, whether you’re building a garden path or a full driveway.
Start by removing all grass, plants, and topsoil from the marked area. You need to get down to firm ground, free of roots and organic matter. If you leave roots or soft soil underneath, it can decompose or shift, causing uneven surfaces in just a few months.
Next, dig to the proper depth based on the type of project. Depth matters because it determines how much support your paving surface will have. For a light-use garden path, a total depth of around 100mm (including base and bedding layers) is usually enough. For a driveway or any area that will handle vehicle traffic, you’ll want at least 200mm or more to create a strong, load-bearing foundation.
Once you’ve reached the right depth, it’s time to add the base course. This layer is typically made of crushed rock or compacted gravel, such as GAP 40 or GAP 20, which are commonly available in New Zealand. Spread it out evenly to about 70–150mm thick, depending on whether you’re paving a path or driveway. Use a rake to level it roughly, then compact it thoroughly using a plate compactor. Compacting the base is essential, it reduces air pockets and ensures the surface won’t shift or settle over time.
Here’s a quick reference to help:
- Garden paths: Base depth of 70–100mm
- Driveways: Base depth of 150–200mm or more
A compacted, stable base is the difference between a professional result and one that falls apart within a season. Take the time to get it right, you’ll thank yourself later when your paved area stays level and clean for years to come.

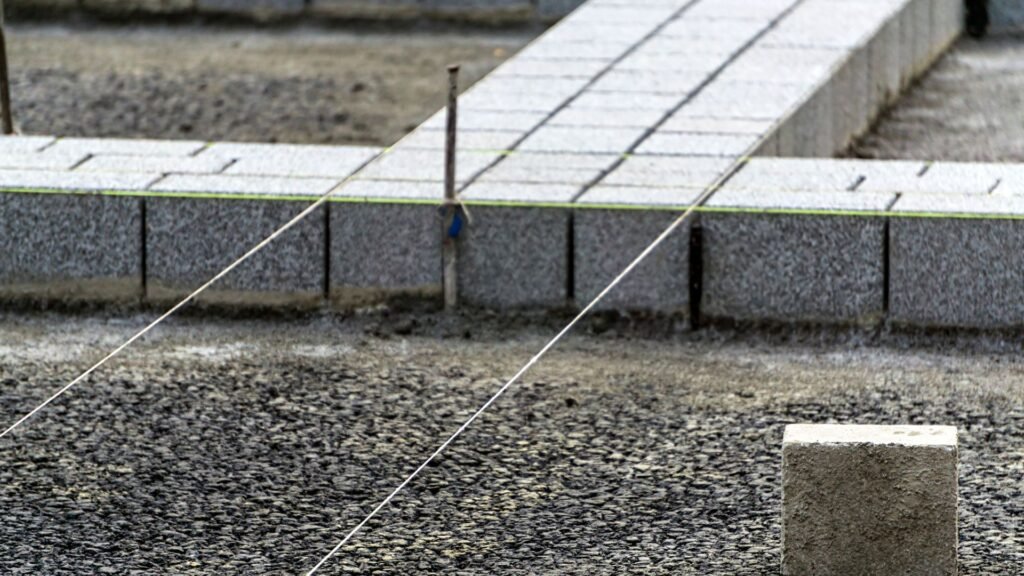
Step 3: Laying Bedding Sand
Once your compacted base is in place, the next step is laying the bedding sand. This layer plays a key role in providing a smooth, even surface for your paving stones. It helps absorb slight variations in stone thickness and ensures each paver sits firmly in place without rocking or shifting over time.
Start by spreading a layer of coarse, sharp sand across the prepared base. For most paving projects in New Zealand, a bedding layer between 2 to 4 centimeters thick is ideal. If it’s too thin, the stones may not settle properly. If it’s too thick, the surface could shift under pressure. Aim for consistency in depth across the entire area.
After spreading the sand, screed it evenly to achieve a flat, level surface. Screeding means dragging a straight board (also called a screed board) over the sand to level it out. You can use two parallel guide rails made from timber or metal pipes to help control the depth. Set these rails slightly above the final height of the sand and slide the screed board across them in smooth, even strokes.
Getting the surface level at this stage is crucial. Uneven sand can cause your pavers to settle at different heights, leading to a lumpy, uneven finish. A flat sand bed helps maintain proper alignment, spacing, and drainage when the pavers are laid.
- Here’s a simple tip: Use two straight boards, one as your screed and the other as a guide, to make the job easier. Pair this with a standard spirit level to check for dips or high spots as you go. Take your time and check your work often. It’s much easier to fix uneven sand now than to reset pavers later.
By laying and leveling the bedding sand properly, you’ll set a strong foundation that keeps your paving stones stable and long-lasting. This step, while simple, often makes the biggest difference in the final look and feel of your project.
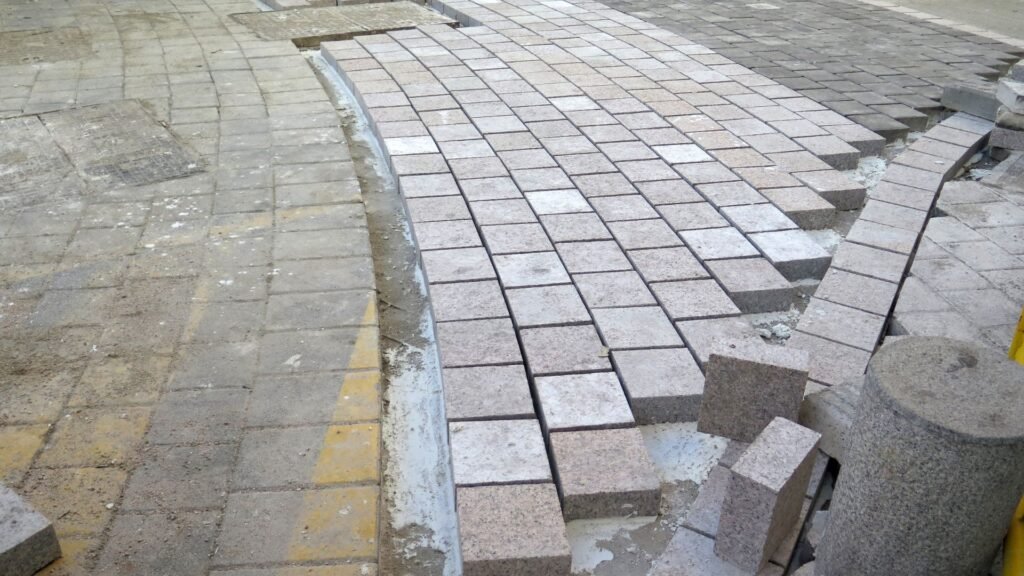
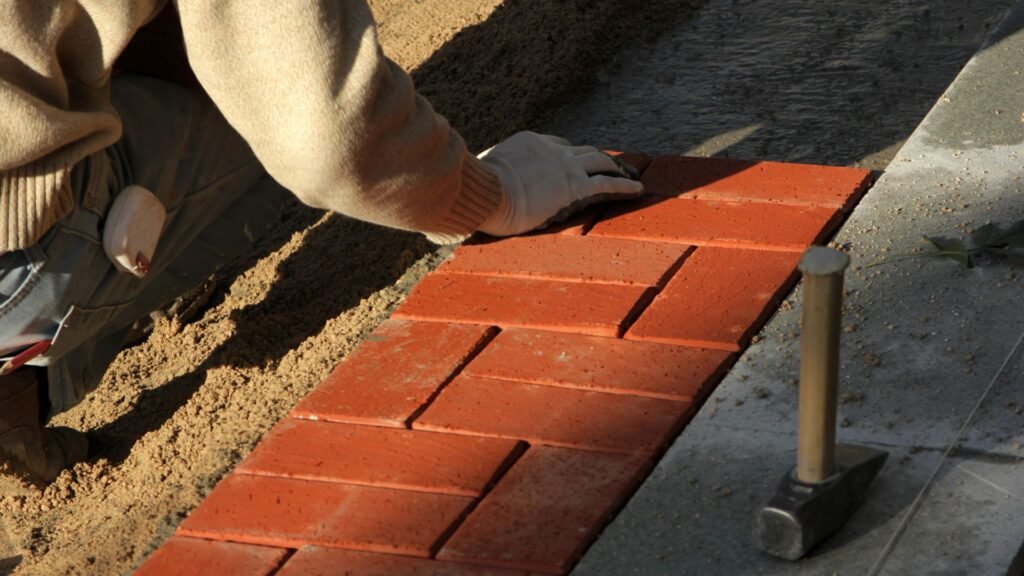
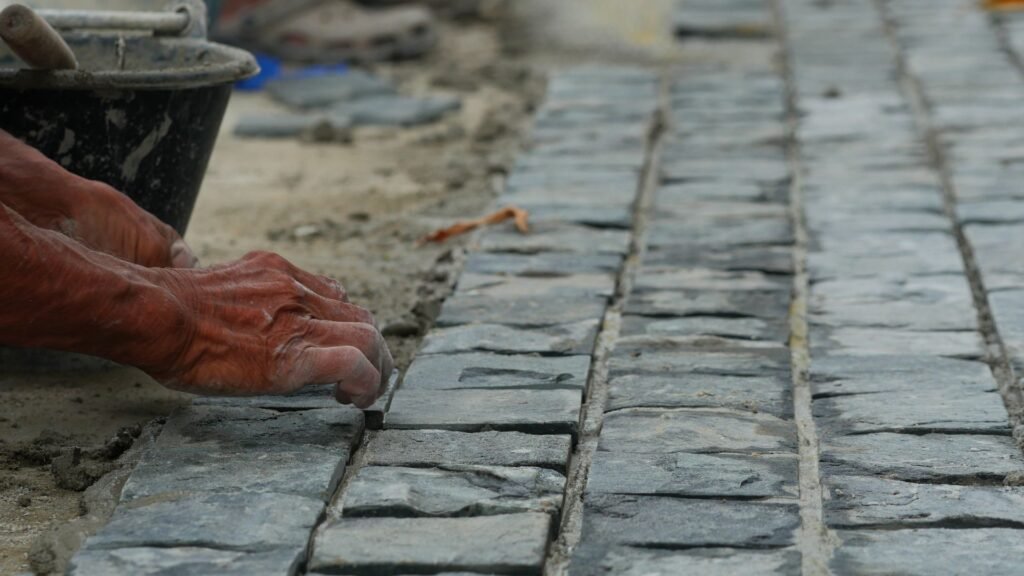
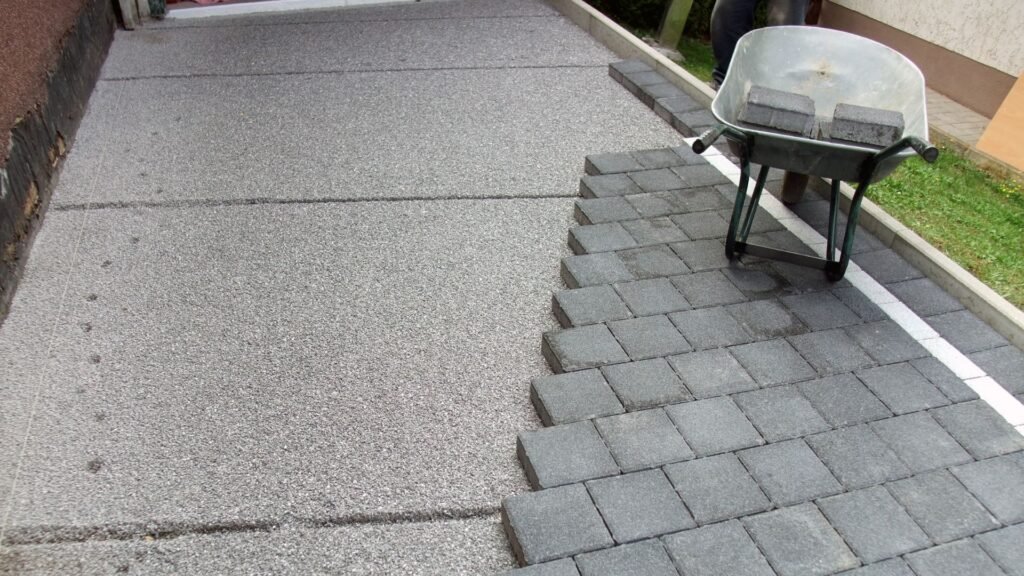
Step 4: Placing The Paving Stones
Once your base and bedding layers are in place, it’s time to start laying the paving stones. This step is where precision matters most. Taking the time to get it right here will save you headaches down the road.
Start in one corner or along a straight edge, such as a wall or the edge of a driveway. This gives you a solid, visible reference point to keep your lines straight. Laying from a straight edge helps maintain alignment and creates a cleaner look when you step back and view the finished surface. If your area doesn’t have a fixed border, use a string line or timber guide to keep everything in check.
To maintain consistent spacing between each stone, use small plastic spacers or simply eyeball it using a set reference. Most paving stones are designed to have uniform gaps, usually around 3mm to 5mm wide. Consistent spacing isn’t just about appearance, it also allows room for jointing sand and helps with water drainage. Uneven gaps can lead to shifting stones and water pooling, especially in New Zealand’s rainy months.
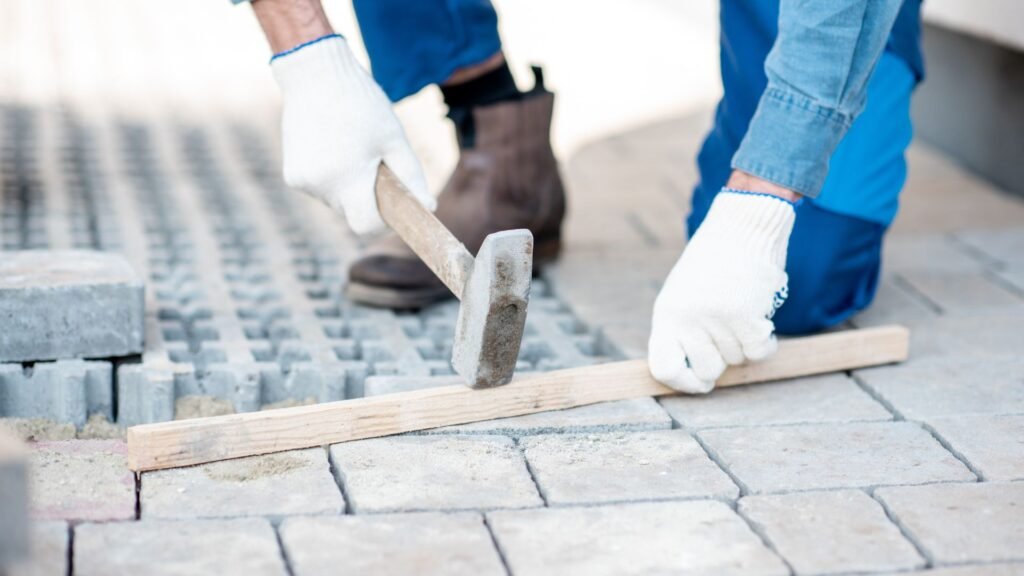
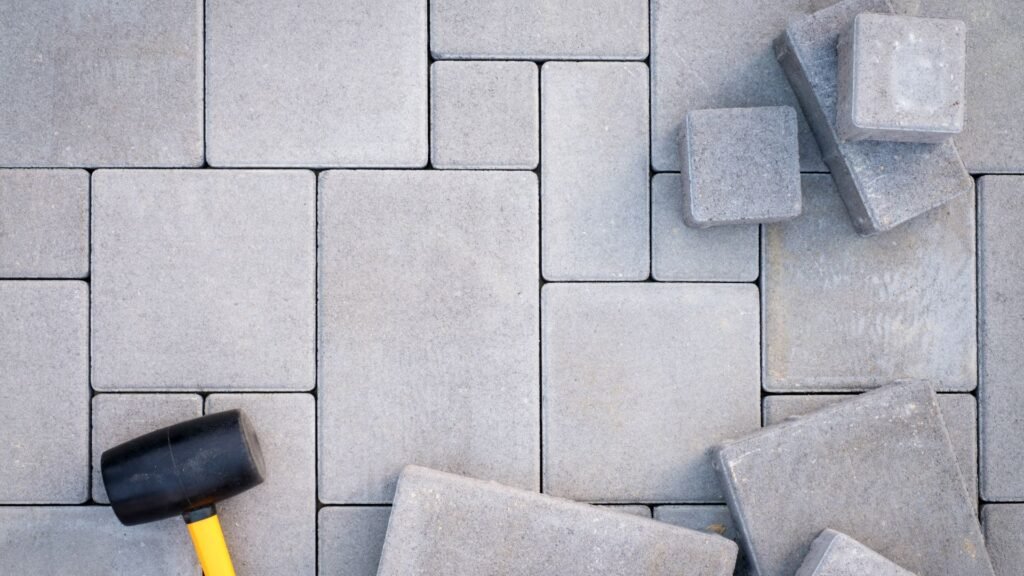
Once a paving stone is in place, gently tap it down using a rubber mallet. Avoid using metal tools, as they can crack or chip the stone. The goal is to bed each stone firmly into the sand layer without displacing the sand underneath. If a stone sits too high, remove it, scoop out a little sand, and reset. If it’s too low, add more sand underneath before repositioning. Don’t rush this process, it’s easier to fix now than later.
Keep checking the level of each stone as you go. Use a long spirit level or a straight board to compare multiple stones at once. You want the surface to be even, but also follow any planned slope for drainage. Uneven paving not only looks bad but can create tripping hazards or water issues. As you move along, step back every few rows to assess how it’s all coming together. This helps catch any minor alignment issues early.
Placing paving stones might seem repetitive, but staying consistent and focused during this stage makes all the difference. A well-laid surface reflects your attention to detail and will hold up for years, even through New Zealand’s changing weather conditions.

Step 5: Cutting And Shaping Stones
Not every paving project will fit perfectly with the size and shape of standard paving stones. That’s where cutting and shaping come in. This step helps you get a clean, finished look around the edges, corners, or tight areas like garden beds, curved paths, or drainage outlets. You only need to cut stones when a full-size paver won’t fit into a space, or when you’re dealing with irregular or custom patterns that require adjustments. Cutting ensures each stone aligns properly with your layout, keeps the gaps consistent, and prevents awkward overlaps or large empty spaces that can weaken the structure.
There are two common tools you can use to cut paving stones: a masonry saw or a bolster chisel and hammer. A masonry saw is faster and gives cleaner results, especially for straight cuts. It’s the preferred option for larger projects or if you want a precise finish. If you don’t have access to one, most hardware stores across New Zealand offer rental services. For smaller DIY jobs, a hammer and chisel are fine for shaping stones. Score the stone along the marked line, then apply a sharp tap to break it along that line. It won’t be as neat, but it works well for areas that won’t be highly visible.
No matter which method you choose, safety comes first. Always wear safety glasses to protect your eyes from flying debris. Use ear protection if you’re working with power tools, and wear gloves to prevent hand injuries. If you’re using a masonry saw, wear a dust mask or respirator to avoid inhaling fine particles, especially when cutting indoors or in enclosed areas. Secure the stone before cutting to keep it from shifting. Taking these steps protects you from accidents and helps ensure a smooth paving job from start to finish.
Step 6: Adding Joint Sand And Compacting
After laying all your paving stones, the next step is to fill the gaps between them with joint sand. This process helps lock the pavers in place, adds stability, and prevents shifting over time. It also plays a major role in keeping out weeds and pests that could grow or nest between the cracks.
Start by brushing fine, dry sand over the surface of your paving stones. Use a stiff broom to sweep the sand into the joints, making sure each gap is filled thoroughly. Work the sand in multiple directions to ensure full coverage. Don’t rush this part, it’s important that the sand reaches the full depth of the joints.
Once all the joints are filled, run a plate compactor over the surface. This step helps the pavers settle into place and ensures the sand fills any air gaps. The vibration from the compactor will also shake the sand deeper into the joints, improving overall stability.
After compacting, you might notice that some joints have settled and now appear lower. If that happens, simply add more sand and sweep it in again. Repeat the compaction if necessary.
For best results, use kiln-dried sand. It flows easily into joints, compacts well, and reduces moisture buildup, which can lead to moss or weed growth. This type of sand is commonly available at NZ hardware stores and is especially effective for outdoor paving in areas with frequent rain.
This step may seem small, but it plays a big role in making your paved surface strong, clean, and long-lasting. Skipping it or rushing through can lead to loose pavers and early wear. Take the time to do it right.
Step 7: Cleaning And Finishing Touches
Once all the paving stones are laid, leveled, and compacted, it’s time to wrap up your project with a few final steps that make a big difference. This last stage is all about improving the appearance of your paved area and helping it last longer.
Start by sweeping away the excess jointing sand. Use a stiff broom and work diagonally across the paver joints to ensure the sand settles evenly and fills all the gaps. Don’t rush this part. Missing or poorly filled joints can lead to movement or erosion later on, especially with heavy foot traffic or rainfall. If some joints look low after sweeping, simply add more sand and sweep again until everything is flush and tightly packed.
Once the sand is set, consider applying a paving sealant. While sealing is optional, it offers several long-term benefits. A quality sealant can protect your paving stones from water damage, stains, and fading caused by UV rays. It also helps lock in the jointing sand, which reduces the chances of it washing out during storms. If you’re in an area prone to heavy rain or moss build-up, common in parts of New Zealand, sealing your pavers is a smart move.
To keep weeds from growing between the pavers, use kiln-dried sand or polymeric sand for the joints. These types of sand create a tighter bond that’s harder for weeds to penetrate. You can also apply a natural weed barrier underneath the base layer during installation, which helps stop weeds from pushing up over time. Avoid using harsh chemical weed killers unless absolutely necessary, as they can damage the pavers and surrounding lawn or garden areas.
Taking the time to clean, seal, and finish your paving properly will leave you with a strong, clean surface that not only looks great but also stands up to NZ’s unique climate conditions. It’s a small effort that pays off in the long run, both in appearance and durability.
Common Mistakes To Avoid
Laying paving stones seems straightforward, but a few overlooked steps can cause problems over time. Whether you’re paving a small garden path or a full driveway, avoiding these common mistakes will save you time, money, and frustration.
- Uneven Base Or Not Compacted Enough
A solid, level base is the foundation of any successful paving job. Many DIYers make the mistake of rushing this step, either by not digging deep enough or skipping the compaction process. Without a firm base, paving stones can shift, sink, or crack under pressure. To prevent this, always excavate to the correct depth (typically 10–25cm depending on the project), use crushed rock or gravel as your base layer, and compact it thoroughly using a plate compactor. The more solid your base, the longer your paved area will last. - Skipping The Slope For Drainage
Another common error is forgetting to factor in proper drainage. Flat surfaces may look tidy at first, but without a gentle slope, water can pool, leading to erosion, algae growth, or even flooding. In New Zealand’s varied climate, this becomes an even bigger issue. Aim for a slight gradient of about 1–2% (1–2cm per meter) away from structures like homes or garages to guide water off the surface. Always plan your layout with runoff in mind. - Not Checking For Council Rules
Some homeowners forget to check local council regulations before starting. While small paving jobs often don’t require permission, certain conditions, like building close to property boundaries, public spaces, or drainage systems, might trigger the need for consent. Neglecting this step could result in fines or having to redo the work. It’s a good idea to visit your local council’s website or make a quick call to confirm the rules for your area. - Using Wrong Sand Or Joint Material
Not all sand is created equal. Using the wrong type, like soft, dusty, or overly fine sand, can weaken the structure of your paved surface. For the bedding layer, use coarse washed sand that compacts well. For the joints, use kiln-dried sand, which settles into the gaps tightly and helps prevent weeds and ants. Avoid general-purpose or builder’s sand, as it won’t provide the same long-term durability or stability.
By avoiding these four mistakes, you’ll give your paving project a strong foundation and a polished, long-lasting finish. Proper prep, attention to detail, and some local knowledge go a long way in ensuring success.
Maintenance Tips For Long-Lasting Results
Keeping your paved surface in good shape doesn’t stop once the last stone is laid. Regular maintenance is key to making sure your paving stones last for years without shifting, cracking, or becoming an eyesore. Below are simple, effective maintenance tips tailored for New Zealand conditions that will help you protect your investment and keep your outdoor area looking clean and tidy.
- How Often To Sweep Or Re-Sand Joints
You should sweep your paved area at least once a week, especially if it’s near trees or garden beds. Leaves, dirt, and debris can trap moisture and lead to weed growth between the stones. Frequent sweeping also prevents the surface from becoming slippery in wet weather. Over time, the joint sand between pavers may wash out due to rain or foot traffic. If you notice gaps forming between the stones, re-sanding is necessary. Use kiln-dried jointing sand and brush it back into the spaces until they are filled. For most homes, re-sanding once or twice a year is enough to keep the pavers tight and stable. - Handling Stains Or Moss Buildup
Stains and moss are common in shaded or damp areas, especially during NZ’s wet winters. For stains caused by food, oil, or garden matter, use warm water and mild detergent. Avoid harsh chemicals that can damage the stone surface. For stubborn oil stains, apply a degreaser designed for concrete or pavers. Moss or algae buildup is best handled with a stiff broom and a vinegar-water mix. If the problem persists, use a moss-killing product made specifically for paving. Always rinse thoroughly after cleaning and make sure the area dries out properly to prevent regrowth. - Resealing Every Few Years (Optional)
While not always required, sealing your pavers can add an extra layer of protection against stains, moisture, and UV damage. It also helps enhance the color and makes cleaning easier. Choose a breathable sealant suitable for the type of paver you’ve used, concrete, natural stone, or clay. In most NZ environments, resealing every 3 to 5 years is enough. Make sure the surface is completely clean and dry before applying the sealant, and follow the product instructions carefully to avoid streaks or peeling.
By staying on top of these simple tasks, you’ll not only extend the life of your paved area but also keep it looking fresh and safe for daily use. Proper maintenance reduces long-term costs and helps you enjoy your outdoor space without constant repairs.
Ready to transform your outdoor space? Visit us to explore quality paving products, tools, and expert tips, everything you need to get started today.
FAQs: About How To Lay Paving Stones In NZ
Do I need council approval to lay paving stones in NZ?
In most cases, you don’t need council consent for small paving projects on private property. But if your project affects drainage, public land, or property boundaries, it’s best to check with your local council first.
What’s the best time of year to lay paving stones in NZ?
Spring and early summer are ideal. These seasons offer mild, dry weather, which helps with excavation and setting materials properly without excess moisture.
How deep should I dig for the paving base?
You’ll typically need to dig 10–15cm for paths and up to 20–25cm for driveways. This depth includes the base course and sand bedding layers.
Can I lay paving stones directly on soil?
No. Laying pavers directly on soil can lead to shifting, sinking, and weed growth. A proper base of compacted gravel and sand is essential for stability and drainage.
What kind of sand should I use under paving stones?
Use coarse bedding sand or paving sand, about 2–4cm thick. Avoid fine beach sand, as it doesn’t provide proper support.
How do I keep paving stones from moving over time?
Use a solid base, compact everything thoroughly, and install edge restraints or concrete haunching to lock the pavers in place.
Do I need to seal my paving stones?
Sealing is optional but recommended. It protects against stains, moss growth, and weathering, especially in high-traffic areas or damp regions.
How do I cut paving stones to fit corners or edges?
Use a masonry saw for precise cuts or a hammer and bolster chisel for basic shaping. Always wear safety gear during cutting.
Can I lay paving stones over existing concrete?
Yes, but only if the concrete is level, in good condition, and allows for drainage. You may need to add a layer of sand or mortar to even the surface.
How long will a paved area last if done properly?
With proper installation and maintenance, paving stones can last 20 years or more. Regular cleaning, joint sanding, and occasional sealing will extend their life.
Conclusion
Laying paving stones in NZ might seem like a big project, but with the right tools, a bit of planning, and a step-by-step approach, it’s something almost anyone can do. Taking on this kind of DIY task gives you full control over the look, layout, and finish of your outdoor space while helping you save on labor costs. More than that, there’s real satisfaction in completing a job yourself and seeing the transformation take shape. Whether you’re updating a garden path, building a new patio, or fixing up the driveway, doing it yourself lets you match the design to your taste and budget. If you’re ready to get started, check out trusted NZ suppliers for paving stones, compactors, screed boards, and other essential tools that make the process easier and more accurate.